It's been awfully quiet here, and that's because I have poured most of my creative energy into video editing. With tons of footage from an eleven-day trip through the Alps, I'm slowly creating one episode after the other. So far I have a teaser and full episodes for days one and two. I hope you'll enjoy them! And if you'd rather read a written account of our trip, head over to Ben's blog. He has a great day-by-day account with lots of beautiful photos.

Ride or pie -- the eternal question. Bike tech, ride reports, and other stuff few people care about.
Sunday, March 23, 2025
Sunday, December 29, 2024
Tried and liked 2024
I thought I didn't have a lot for this year's edition of tried-and-liked. But once you get going, things add up.
Tried and liked
- Ortlieb Seat Pack (16.5l): For a bike touring adventure (see below), I needed a big seat bag to supplement my front rando bag. The Ortlieb works well on my tall low-trail bike with an almost level top tube. However, I have juuust enough seat post showing to make it work. I also got to experience the droopy behavior that I had read about. It happens when the bag is not packed tightly enough (and you can buy accessory straps to prevent it). But my bike is tall enough that there is no risk of the bag touching the rear wheel
 |
| Droopy seat bag |
- Bike touring the Alps. Went on an 11-day trips through the Alps with a
friend. We packed light and slept in hotels and it was amazing.


- Taking videos of rides: In prep for the Alps trip, I bought a DJI Action 4 cam and worked on my editing skills. Editing takes a lot of time, but it's also a fun way to reminisce about your rides. Here's my little YouTube channel https://www.youtube.com/@ride-or-pie
- Rene Herse Nuda mini pump: It's amazingly light and small, and it worked well enough when I had a flat on my skinny tire road bike.
- Selling a couple bikes/frames: I sold a record number of bikes, that is, three, this year. It felt good to pass on bikes that didn't get ridden/loved enough.
- Replacing the battery on my Wahoo Elemnt: Repairing things that are probably not really meant to be repaired is very satisfying. The computer is five years old now and I don't feel a strong urge to upgrade now that the battery capacity has been restored.
 |
| Wahoo surgery |
To be determined
- Ass Savers Win Wing fenders: I bought these recently and have had only one or two wet rides to test them with. Easy to install, extremely light, and they do seem to work.
 |
| Ass Savers Win Wing fender |
- Chain waxing: I hopped on the wax train this fall, with a cheap used crock pot setup. The process is not too bad and I like the results immediately after waxing. But it seems that the drivetrain gets noisy pretty quickly. I'm not sure if I can deal with the frequency of rewaxing that seems to be required. Maybe fancier equipment would help? Probably not, though.
- Indievelo/TrainingPeaks Virtual: A new-ish indoor training platform with a focus on racing. I decided to give this a try instead of Zwift. I like the racing experience better than Zwift so far, but it's still a small platform. So often you end up racing against bots. The bots are implemented very well, though.
Saturday, June 29, 2024
I'm a YouTuber now
It's been a while since I've published here. It's not for a lack of riding -- I've ridden more than ever this year. The reason is that I bought an Osmo Action 4 camera and am trying my hand at ride videos. Video editing has a steep learning curve, but I think I'm getting better. Here are a couple videos I produced in the past months.
An overnight trip to Beaver Dam, with headwind both ways
The Great Sauk State Trail
My first Permanent in 2024
Madison to Chicago and back, by train an fixed gear bike
Sunday, December 31, 2023
2023 Ride Highlights
It's 4:46 pm on New Year's Eve. Will I be able to put together a post with ride highlights for the year? Sure! No particular order. Just memorable rides, for one reason or the other.
A 200k with Ben
Ben and I have big plans. So we rode my 200k permanent route together. We probably went a little fast, had some mechanical and biomechanical issues, but overall it went well!

Full Moon on a parking garage
Not every memorable ride needs to be long. After a friend's birthday party I decided to explore a large new development. A new parking structure was still empty but kinda open. On top I got a great view and the full moon.

Pick Me Up at the Border
For the first time, I actually rode all the way to the Illinois border and back on this ride. As per usual, the weather was questionable, and I didn't actually enjoy the ride too much. But it was good to check this one off.

Birthday Ride for Nicole
We celebrated Nicole's birthday at Dot's Tavern, right off the Badger State Trail. Beautiful evening/night ride.


Wright Stuff Century, extended version
Another good one with Ben. The Wright Stuff Century used to start in Middleton, but this year the start was farther away, at Brigham County Park. Ben and I rode to the start from Madison and then did the "short" route.

Zugspitze mini golf
My riding in Germany was cut short because of injury. But this was a fabulous ride in the German Alps. I biked; Nicole took the train, and we met up for mini golf in the most spectacular setting.


A ride that shouldn't have happened
Knees were wrecked from hiking and there was record heat. I abandoned along the route but probably shouldn't even have started.

Ride for your Life
The biggest advocacy ride Madison has ever seen.
Wind, mud, CX
Like every year, I rode to the Trek Cyclocross World Cup. It was windy, wet, and muddy.


MKE x MSN Sandhill Station Camping
A meeting of urbanism/street safety/bike advocacy folks from Milwaukee and Madison. Not quite at the halfway point.

Fetch the Keg
Madison Bike Week: Get beer donated from Hop Garden, pick up by bike. Make it a group ride. Suffer on the hills on your fixie.
 |
| Credit: Ben Sandee |
Kites on the Lake
I didn't get many frozen lake rides in this year, but this was a good one. Kite festival on the Lake.

Camping with Nicole
Our tent leaked. It was a wonderful camping trip to Sandhill Station nonetheless.

Another 200k
Dipping into Illinois again for some, uh, shopping and tile collecting.


Not the Ride Across Wisconsin but
Went for a spontaneous ride without a fixed route and ended up on the Ride Across Wisconsin route, going the opposite direction. It was awesome to see the endless string of the people on the ride.

Friday, April 7, 2023
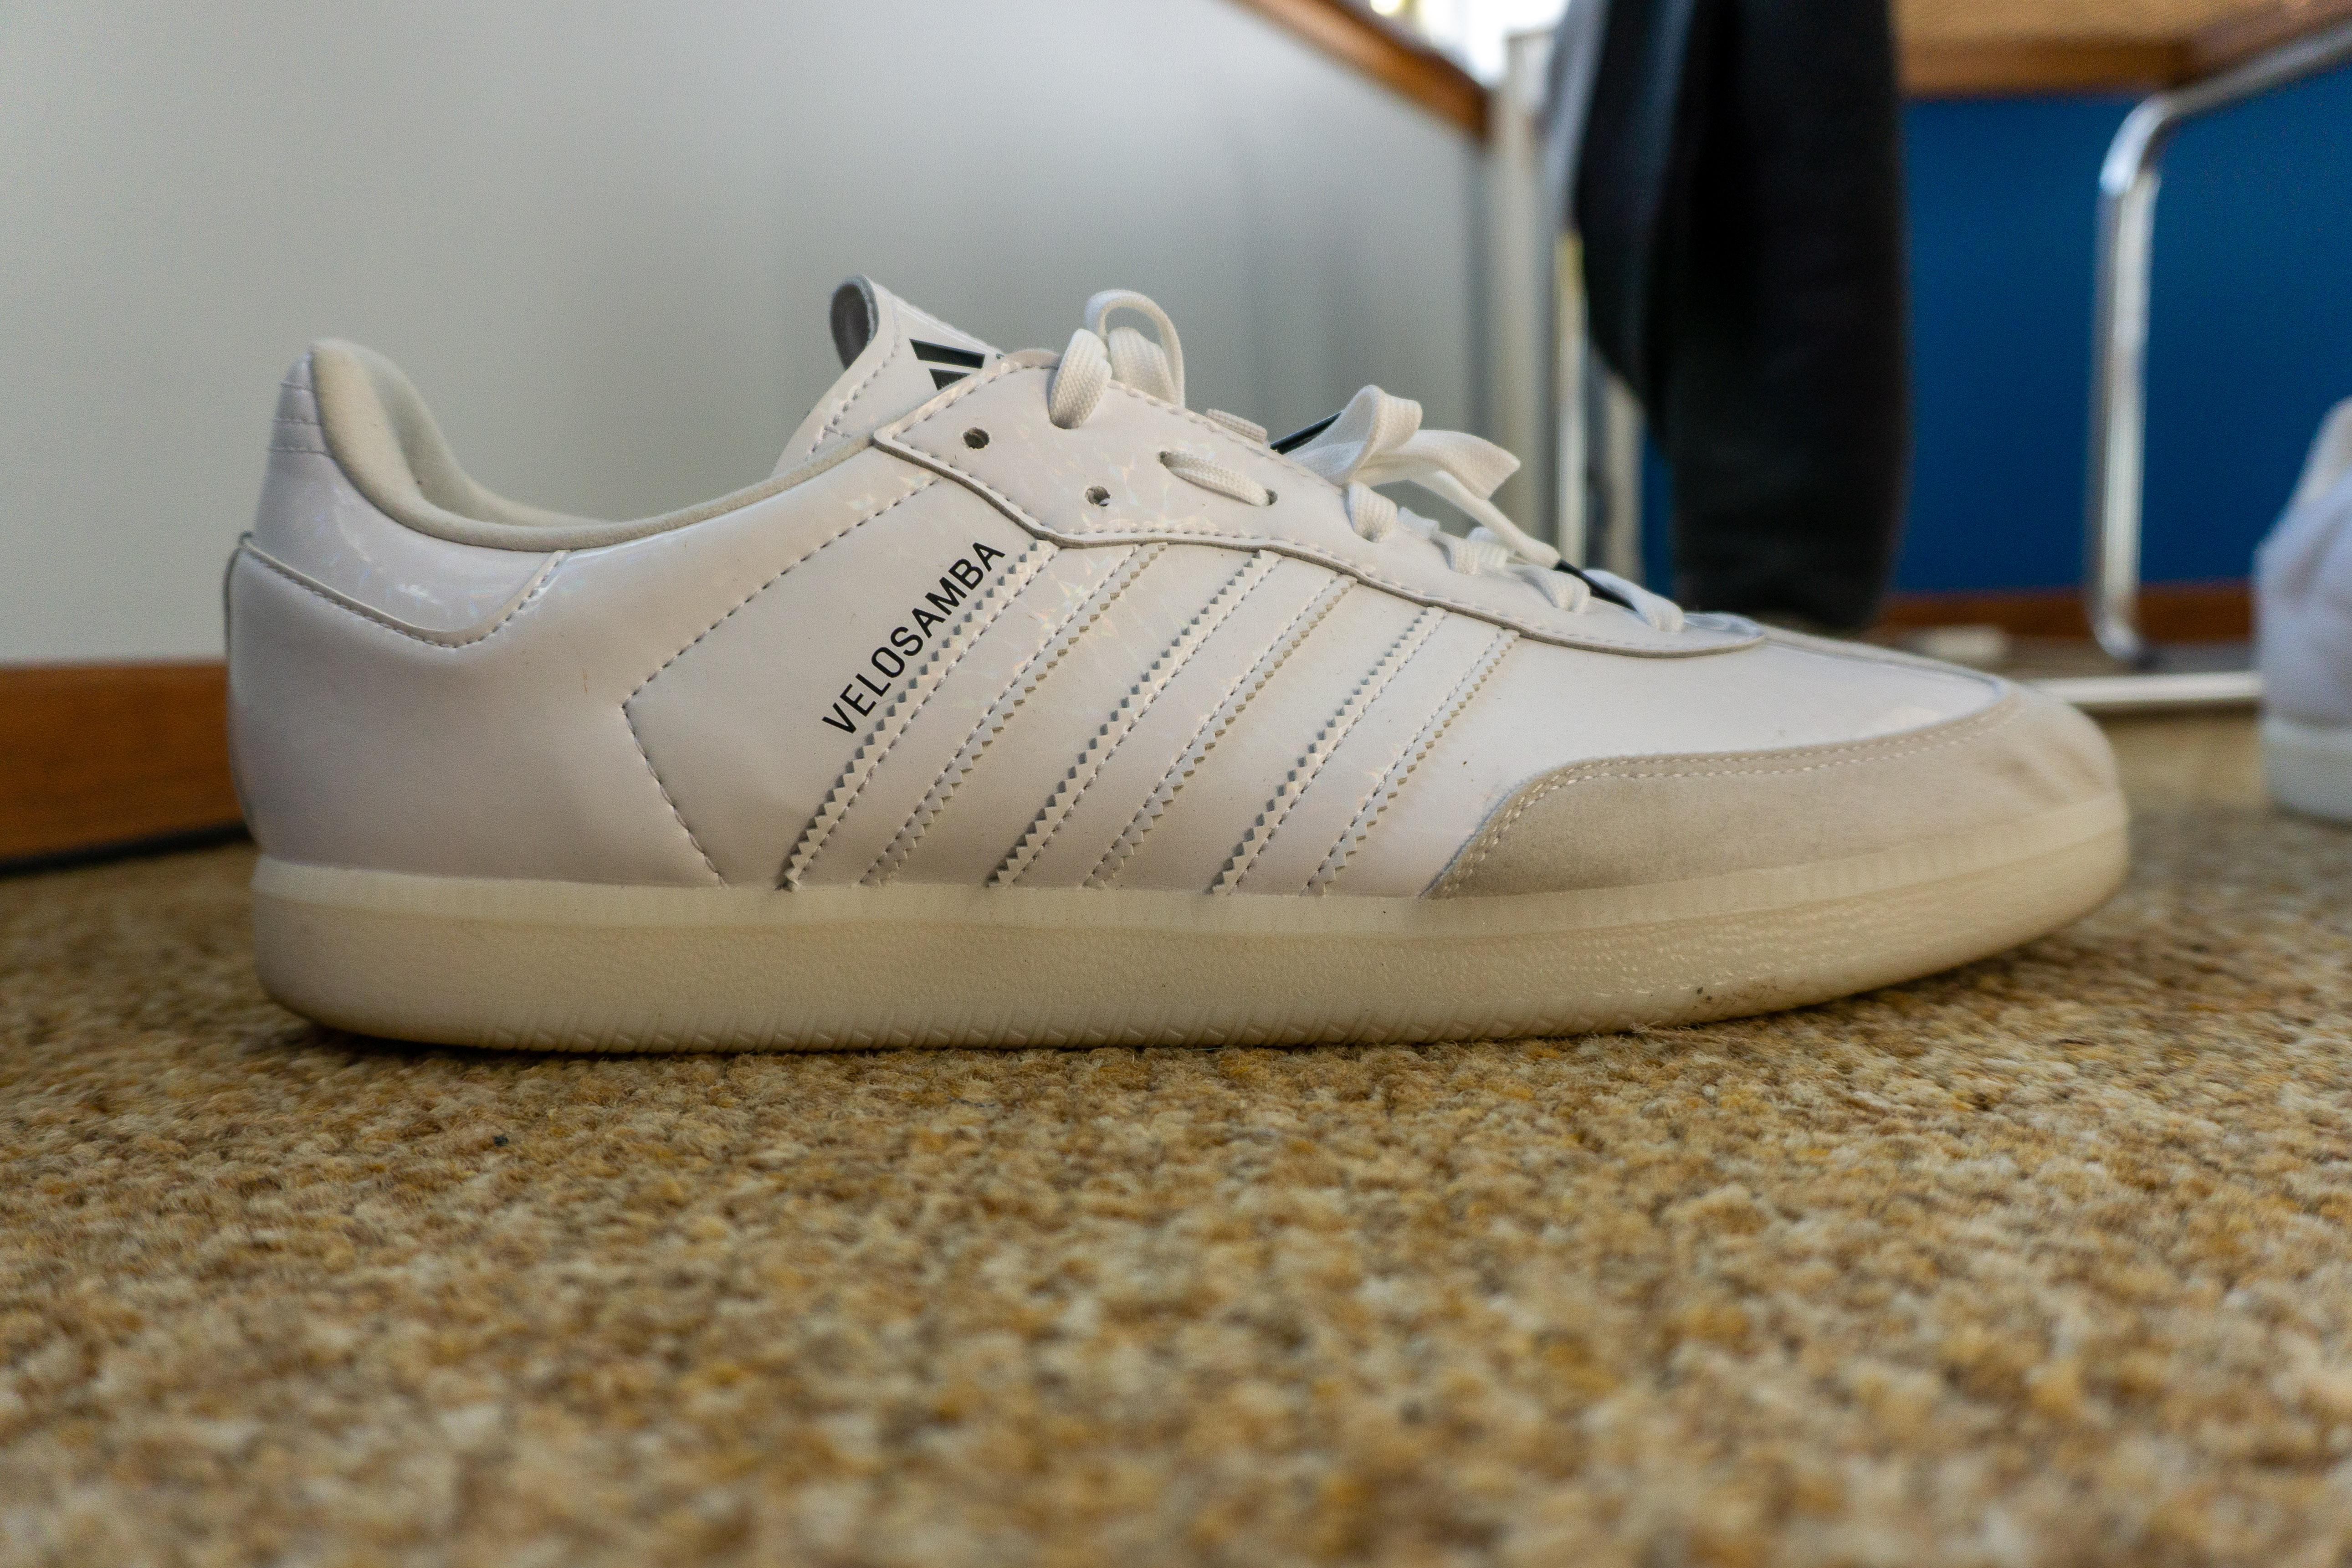
First impressions: Adidas Velosamba: vegan, good looking, no crunch

For years, my casual cycling shoe of choice was the Giro Rumble VR. I extensively reviewed the shoes on this blog. While I've had my complaints about them, on balance they were a great shoe and the ended up lasting longer than I thought. I actually still have an unused spare pair in the closet. But when it was time to retire the current pair, I was curious to try something different.

The Adidas Velosamba struck me as an interesting option. I'm German, and even though I never owned an actual Samba shoe, the aesthetic appeals to me. Add to that they're vegan and Adidas was selling them at a discount.
I bought the shoes just before winter and so for several months I didn't actually have a chance to wear them. But now winter is nearing its end and I've worn them enough to write up my initial impressions. These impressions are heavily influenced by my experience with the Giro Rumble VR: Are the Velosambas better? Is that even a sensible question to ask? We'll return to that at the end of the post.

Let's start with the looks. The shoes come in 7 different styles, from the classic black with gum sole and white stripes, some more colorful options, and finally an all white shoe. If you know me, you would be surprised that I went for the all-white shoe! Is a white cycling shoe actually practical? I had my doubts, but in the end those were the ones on sale at the steepest discount while still being available in my size. So I was willing to take a gamble. When the shoes arrived, I was really pleased: The white is bright, and slight iridescent under light. The upper material is mostly very smooth plastic and probably cleans up fairly well. At the front of the shoe, there is some fake suede leather, which probably is more challenging to keep clean. The laces are white as well, with black ends as a color accent.

Functionally, the Velosamba has a few nice features: The lace retention system is well thought out. You can tuck the laces under an elastic band, which is easily lifted with a little pull tab. The cutout for the SPD cleats also seems to be well thought out: These so far have been the least crunchy bike shoes I've ever owned! Maybe this will change as the shoes wear, but it's unlike the Giros, which were crunchy from the get go.
 |
| Clever lace retention tab |
Speaking of the sole: it seems to be a decent compromise between stiffness for biking and flex for walking. This makes them a great choice for my use case, where I want want a shoe that can easily transition from the bike to walking around town. It appears that the Velosamba is cut lower around the ankles and the heel compared to the Giros. This probably provides less support but probably won't be an issue for me: I often ride with shoe laces barely tightened, but I can see how for some people this might be a problem on longer rides/walks. At any rate, I have neither biked nor walked for longer distances in the shoes so far, and so I'll hold off on a final verdict.
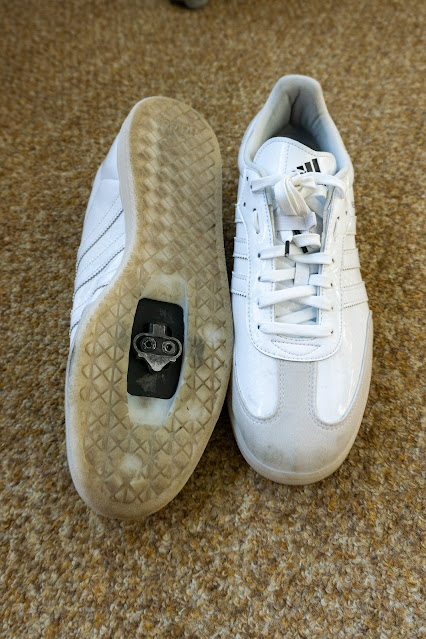 |
| Nicely recessed cleats make for a quiet walk |
So let's come back to the comparison with the Giro Rumble VR. In a head to head comparison, Adidas wins in these areas:
- looks
- less crunch
- lace retention
- walking/standing comfort (to be confirmed)
The Giros are ahead in:
- breathabilty
- price
- foot support
Once I've had the chance to wear the Velosambas for a few months I'll post a follow-up to these first impression. So far I'm really happy with my purchase.
Sunday, December 25, 2022
2022 Ride Highlights
It's Christmas and I just finished reading the latest issue of Bicycle Quarterly. It's the 20th anniversary issue and looks back at highlights from the past two decades. And two days ago I listened to the end-of-year episode of bike podcast Antritt, which also looked back at the year. So now it's time to look back at my bike year and review some highlights.
The Swamp Tile

 |
| Where the road ends, you get out the snowshoes |
A very early highlight of the year: Collecting the damn Swamp Tile. What is the swamp tile? It's a square of land in the Deansville Wildlife Area that's quite inaccessible. I needed to visit that square in an effort to expand my max square for VeloViewer Explorer, and I had failed to reach it twice before. So when the weather looked alright for January, I decided to make
another attempt at the swamp tile in the Deansville State Wildlife Area. I loaded snowshoes on the back of my studded-tired fixie, brought a spare pair of socks in case it'd get my feet wet, biked out there, carried/pushed the bike through frozen swamp/grass and succeeded in reaching the tile! ![]()
Three Lakes X
Riding across the three main Madison Lakes -- Mendota, Monona, and Wingra -- in early February should've been a highlight. Unfortunately the experience was somewhat spoiled by an asshole truck driver at the very beginning of the ride. But still, riding across frozen lakes is still a special experience.
![]()
 |
| Lake number 2: Monona |
Hugh Jass Fat Bike Race
In between a lot of basement Zwifting, I did a fat bike race in late February. Kevin and I made the dubious decision to bike to the start and we arrived barely in time to still register (I'm still embarrassed about dripping all over the sign up sign up sheet as my balaclava thawed... Unfortunately no pictures. ![]()
Colorado
 |
| The high point, literally |
My first time in Colorado was basically a week's worth of highlights. Every ride was amazing, especially the numerous sections of empty gravel roads. This trip also included a ride to the highest point I ever biked to: 3075 meters (10,088 ft).
Gold Hill ![]()
To the top ![]()
 |
| A steep gravel road on the way to Gold Hill |
200 km Permanent Recon
I
like randonneuring. I don't like having to make the arrangements to get
to the start of a brevet in Richland Center. So created a Permanent route (i.e. a randonneur ride that people can do at
any time) out of Madison, dipping into the northernmost parts of Illinois. In June I test rode the route to make sure there weren't any issues with the route or cue sheet. More detailed post here. ![]()

Switzerland
 |
| Toward the Albula |
Another first this year, another highlight: Vacation in the Swiss Alps. The bike highlight of the trip was my loop across two major passes: the Albula and Flüela. ![]()
Second place: Biking from Davos through 4 countries to catch the train back home in Lindau. This is my favorite type of ride: A recreational adventure that has some faint practical purpose to it. I could have just taken the train back from Davos, but riding 130 kilometers through Switzerland, Liechtenstein, Austria and then just across the border into Germany, would save me some small amount money because I had a monthly rail pass. ![]()
 |
| Following the Landquart River toward the Rhine |
 |
| Liechtenstein Parliament: "The highest task of the state is to promote the whole welfare of the people." |
 |
| The final border crossing of the ride, from Austria into Germany |
Swabian Jura Errandonée
 |
| Württembergische Metallwarenfabrik (Württembergian Metal Wares Factory) |
Speaking of fun rides with a purported practical purpose: My parents had borrowed a set of dessert forks from a friend. Somehow a few of the forks disappeared. The obvious solution: A very hot and hilly 126 kilometer ride to the fork manufacturer's HQ and outlet store and back.
Swabian Jura Errandonée ![]()
 |
| New bridge for the high speed rail connection between Stuttgart and Ulm |
 |
| Historic center of Schwäbisch Hall |
 |
| One of the many beautiful, apple-tree-lined roads in the Schwäbischer Wald |
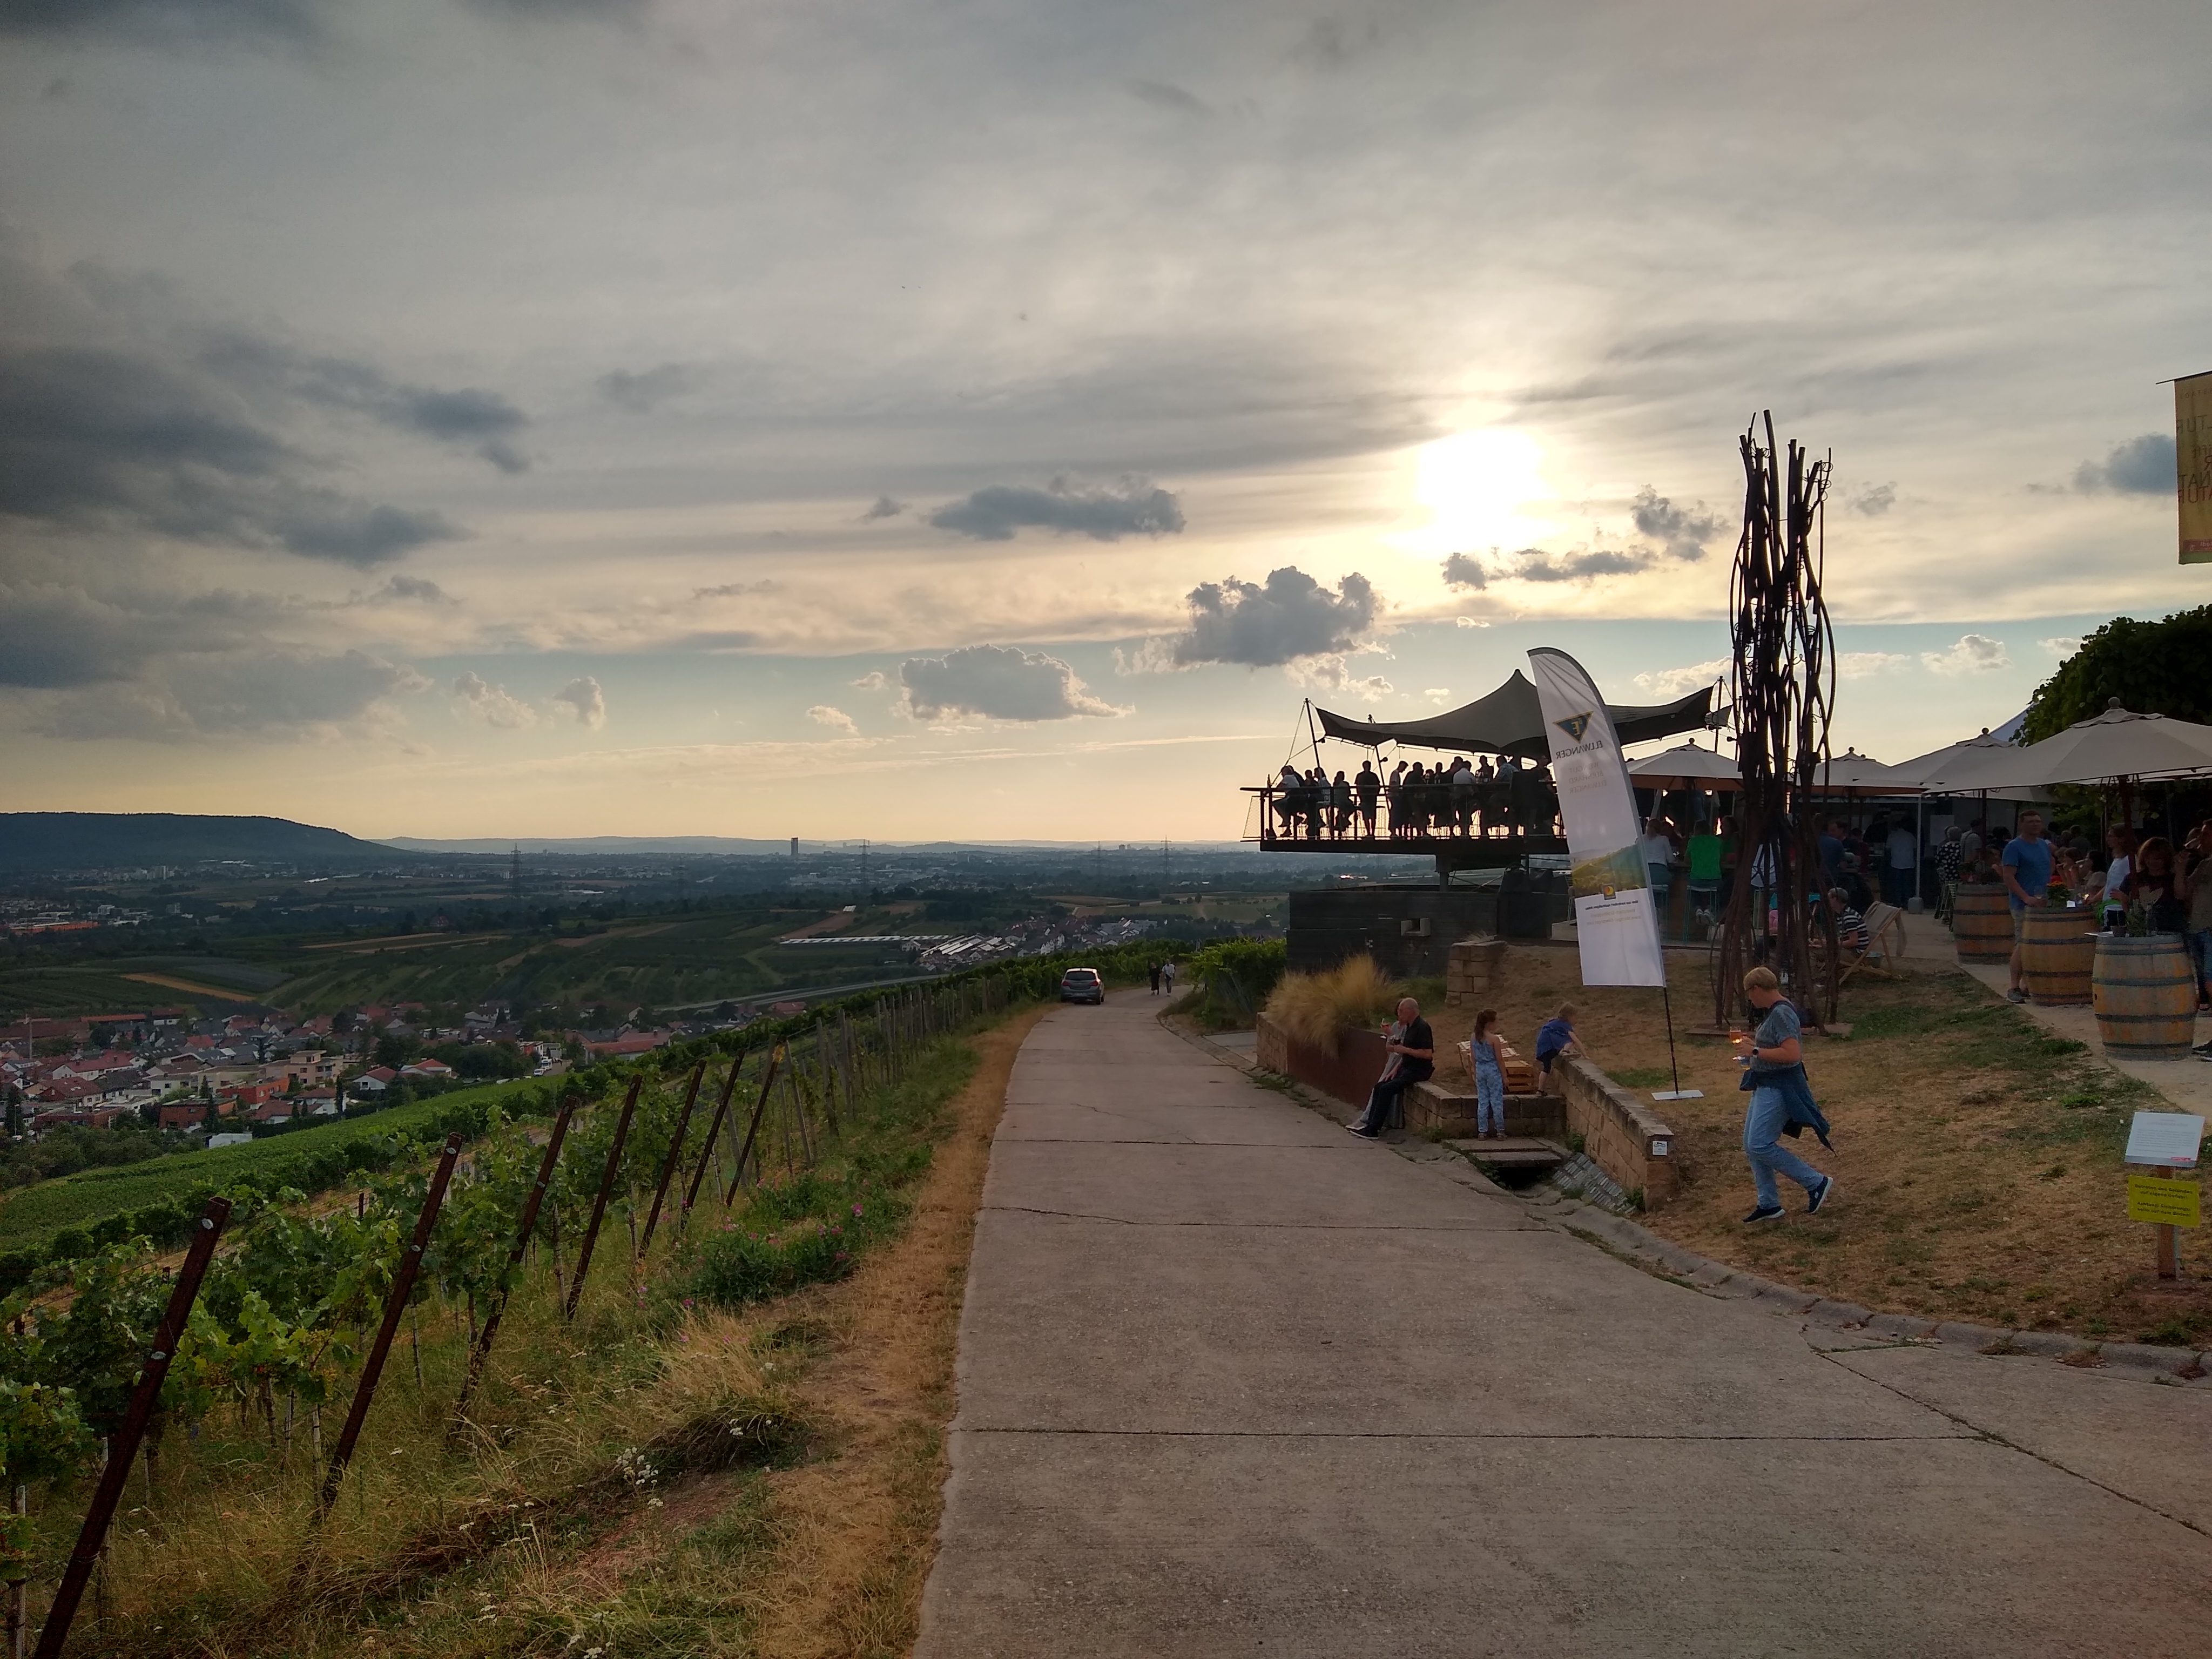 |
| Sunset wine bar in the vineyards |
There were a few other amazing rides in Germany: An after-work ride to a vine bar in the vineyards; a train-bike-train-bike adventure centered around the Stuttgart Critical Mass; and a ride to Schwäbisch Hall on the quiet, scenic (and never flat...) roads of the Swabian Forest.
Karlsruhe to Critical Mass ![]()
Schwäbisch Hall ![]()
Vineyards ![]()
 | |
| Stuttgart Critical Mass |
Fake records
.jpg) |
| Waiting out the rain in Dodgeville |
Once back in the US, I had some repentance to do. Many months ago I had made up a story about a historical event: In the late 19th century, a man named John D. Cannonball wanted to demonstrate the superiority of the highwheeler over the safety bicycle by breaking the previous record for riding from Dodgeville to Madison. My fake was a little bit too convincing and a friend scheduled an event to commemorate the historic ride. We decided to keep the ride on the calendar and of course I felt compelled to participate. So Jacob and I biked to Dodgeville (and got soaked by a thunderstorm) and then rode back to Madison as fast as we could. I think this should become an annual event... ![]()
.jpg) |
| At the "finish line." We and our safety bicycles made good time |
Wright Stuff Century
The Wright Stuff Century is an annual, pretty low-key event organized by Bombay Bicycle Club. It takes you through the Driftless area west of Madison and has a lot of climbing. This was the first time I did the long route and it was very enjoyable. I rode with my friend Andy Q, who was prepping for a 600k ride, and he's a great riding buddy.
 |
| Riding the Driftless with Andy |
Pick Me Up at the Border & Badger Challenge weekend
Two big rides, one weekend: On Friday night, I joined Bike Fitchburg's traditional Pick Me Up at the Border ride: Start in Fitchburg in the evening, ride south on the Badger State Trail toward the Illinois border. Because I had yet another big ride planned for Sunday (see below), riding all the way to the border was too much. Instead I rode with the fast kids in the front for as long as I could and then turned around. It was still over 100 kilometers and I got home just before midnight. ![]()
Then on Sunday it was time for the Badger Challenge, a charity ride for the local cancer center. I was signed up for the 100 mile ride, but with way to the start and back it ended up being my longest ride of the year, at 204 km. I overcooked it early on and had to battle a strong headwind on the way back. A challenge it was. ![]()

Tandem camping at the CX Cup

Despite several attempts earlier in the year, the SO and I never managed to go bike camping. The Trek CX World Cup seemed like the last opportunity. So we loaded up the BOB trailer and rode out there, with an amazing tailwind. And tons of fun at the World Cup. ![]()
 |
| A little chilly for camping |

Season Closer: To Rochelle and back
 |
| Finally! |
To Rochelle: and back
 |
| Nice Illinois gravel, with a side of tailwind |
Subscribe to:
Posts (Atom)